My linocut process involves several steps:
the idea/image
drawing
carving the block
paper and ink
printing
drying
framing
the idea/image
drawing
carving the block
paper and ink
printing
drying
framing
The idea/image
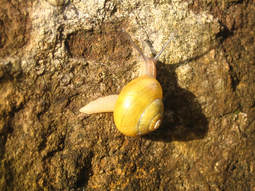
It all begins when I see something--a bird, flower, leaf, fish--that resonates with me.
This 'something' percolates in my mind for a while, sometimes a long while.
Eventually it settles into an image/idea clear enough to work with.
It all begins when I see something--a bird, flower, leaf, fish--that resonates with me.
This 'something' percolates in my mind for a while, sometimes a long while.
Eventually it settles into an image/idea clear enough to work with.
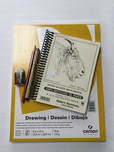
Drawing
Next I sit down with paper and pencil to try drawing the image I have in mind. Using real drawing materials is a mind trick I use to convince myself I can draw what I envision. The drawing goes through several stages and re-draws.
With no formal art training, I do my best to follow the advice given by Betty Edwards in her Drawing on the Right Side of the Brain to "look until I really see."
Often I find a simplified picture on the Net or in a book to place in front of me to help me get the proportions balanced and to remind me of the basic shape of the subject.
Sometimes it just doesn't come together so I set it aside to come back to later--or never!
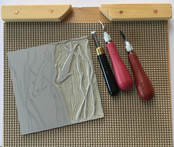
Once the drawing works and I feel it can be a successful linocut carving I use transfer paper to trace the design onto the linoleum block.
Carving the Block
This is where various YouTube videos and books have been really valuable. Two very complete and useful titles are Learning Linocut by Susan Yeates and Linocut for Artists and Designers by Nick Morley.
As for YouTube I have found helpful material under Diode Press and Linocut Boy.
Of course, practice is the only way to develop the techniques and skills described in these resources. Each time I carve a block I learn and improve.
Several types of linoleum for carving are available. My current favourite is Speedball Red Baron grey unmounted.
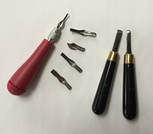
For carving I have a Speedball linocut set with five different blades and a couple of RGM chisels for clearing larger spaces.
This is where various YouTube videos and books have been really valuable. Two very complete and useful titles are Learning Linocut by Susan Yeates and Linocut for Artists and Designers by Nick Morley.
As for YouTube I have found helpful material under Diode Press and Linocut Boy.
Of course, practice is the only way to develop the techniques and skills described in these resources. Each time I carve a block I learn and improve.
Several types of linoleum for carving are available. My current favourite is Speedball Red Baron grey unmounted.
For carving I have a Speedball linocut set with five different blades and a couple of RGM chisels for clearing larger spaces.
I've found that going slowly is essential. Too fast and I risk a slip where a piece is carved out that should remain. Sometimes I can alter my plan to allow for the 'mistake.' In fact the carving process quickly shows me where my design needs to be altered. It can be a serendipitous process.
I've found that going slowly is essential. Too fast and I risk a slip where a piece is carved out that should remain. Sometimes I can alter my plan to allow for the 'mistake.' In fact the carving process quickly shows me where my design needs to be altered. It can be a serendipitous process.
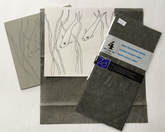
Paper and Ink
Choosing papers and ink has been another journey of discovery--sometimes frustrating, sometimes puzzling but always interesting.
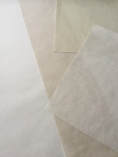
After experimenting with a variety of papers, I settled on Japanese mulberry (kozo) based papers. They take the ink well and are generally lovely to work with. The paper I am currently using is iwami (90% kozo), an above average grade that is more affordable than 100% kozo.
Choosing papers and ink has been another journey of discovery--sometimes frustrating, sometimes puzzling but always interesting.
After experimenting with a variety of papers, I settled on Japanese mulberry (kozo) based papers. They take the ink well and are generally lovely to work with. The paper I am currently using is iwami (90% kozo), an above average grade that is more affordable than 100% kozo.
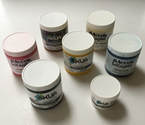
As to ink, I started with Akua Intaglio soy based inks because I had some from a previous adventure. I managed with some help from the Akua people to sort out most of its idiosyncrasies. One important advantage for me is that this ink cleans up with soap and water. Since it dries by absorption it doesn't dry on the inking plate or brayer. Great for allowing time to work with a printing project. The down side is that it also takes a very, very long time to dry into the paper--up to 2 or 3 weeks.
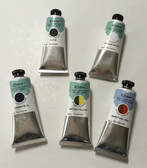
So I have switched to Caligo Safe Wash Relief inks. These are linseed oil based and are also soap and water clean up. These inks dry through a process called 'polymerization' which essentially means they dry on the paper in a few days. Hurrah!
In January 2020, I discovered a new ink to try—VersaFine Clair. It comes in a stamp pad format and is water based. Two colours can be “stamped” and the blended with a finger tip. The result has a softer, more watercolour look which works well with some designs.
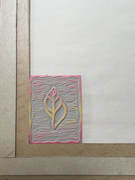
Printing
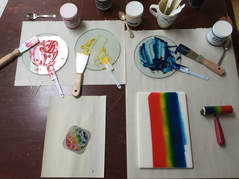
Printing is the most exciting part since the final result can have surprises, both good and not so good. A trial print is a must, offering a chance to 'tweak' the carving before using the good paper.
First a bit of ink is placed on the ink plate, then rolled out with the brayer until it makes a sound something like velcro being separated.
I often like to mix colours to create the shade I want. Mixing colours means I can keep fewer colours on hand. I'm still learning about colour mixing but have achieved some very pleasing results.
Once the ink is the right colour and consistency, I roll it onto the carved linoleum block, place the block in a registration guide and carefully place the paper onto the block, again using the registration guide to position it correctly.
Once the ink is the right colour and consistency, I roll it onto the carved linoleum block, place the block in a registration guide and carefully place the paper onto the block, again using the registration guide to position it correctly.
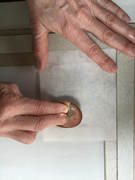
I have tried a few methods of pressing the paper onto the block. Although I used a spoon to burnish the back of the paper (giving a nicely textured look to the prints) for a while, it proved rather tiring.
Last year (2019) I moved to doing all of my printing with my book press as it is physically much less tiring.
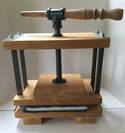
The book press with layers of thick felt around the block and paper.
Drying
Once printed, each print needs to dry. With the Akua inks as noted above, this can be a long process. I found the best method was to layer the prints between pieces of plain newsprint under weight (several bricks). The newsprint needed to be changed two or three times as an oily residue collected on it.
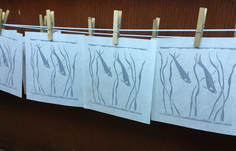
The Caligo ink is much simpler--just hang each print from a clothesline arrangement and in a few days it will be dry.
Once printed, each print needs to dry. With the Akua inks as noted above, this can be a long process. I found the best method was to layer the prints between pieces of plain newsprint under weight (several bricks). The newsprint needed to be changed two or three times as an oily residue collected on it.
The Caligo ink is much simpler--just hang each print from a clothesline arrangement and in a few days it will be dry.
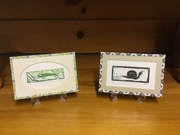
Framing
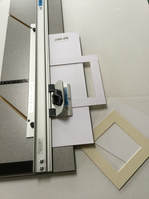
To prepare my prints for sale, I chose to mount and frame them. Not liking the frames I could buy and because my prints are often non-standard sizes I developped my own framing method.
Each print is mounted on a piece of white mat board, then matted with an off-white mat board. I buy large sheets of mat board and cut them to size. I also purchased a mat cutter so that my mat centres are nicely bevelled.
Plexiglass cut to size (on my husband’s band saw) is placed over the matted print.
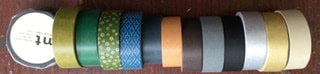
The edges are bound with Washi tape to give a framed print. Again I tried various brands and have now moved entirely to MT brand as it sticks to the plexiglass very well and comes in a nice array of colours.
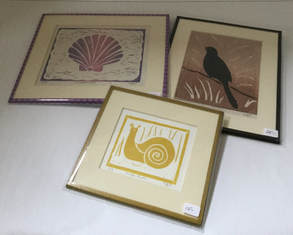
Finally I glue a zigzag picture hanger to the back, slide the framed print into a protective sleeve and my prints are ready to sell.

Thanks for stopping by.
